Explore the Hello World Example
The custom.js includes a widget called helloWorld. The complete code for the widget is right inside of the custom.js. This is not the approach that we will take to create and deploy widgets moving forward; however, it helps in understanding what is required to register a custom widget in ICEC.
As seen in the previous topic, we added a set of arrays and script code in our init section to facilitate the registration process and we will use that process moving forward.
1. Register the helloWorld widget
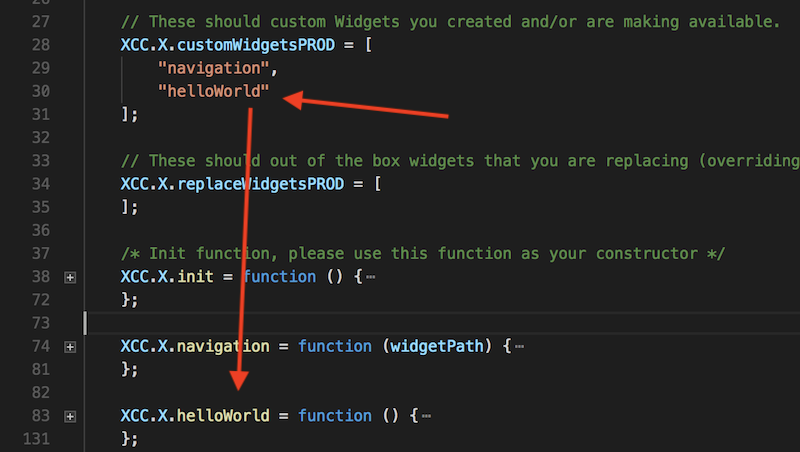
The name of the widget is helloWorld as seen in the screenshot for the line that starts with XCC.X.helloWorld = function(). We need to add that exact name to the appropriate variable. This is a custom widget that is NOT replacing an existing ICEC widget. We can add it to the XCC.X.customWidgetsPROD array as seen in the screen below:
- Click on File > Save to save the update you just made.
2. Review the helloWorld widget
Expand the helloWorld section if it is not already expanded. The helloWorld widget consists of three (3) functions:
myCustomWidget: This is the code that is responsible for rendering the widget. It can contain HTML and JavaScript using regular markup and script tags.myCustomEditor: This is called when editing the widget. We will look at that in other widgets later.save: This is called when saving the widget.
The last line in the helloWorld widget section is a call to the registerCustomWidget function:
XCC.W.registerCustomWidget("LAB8498 Hello World", "flag", myCustomWidget, myCustomEditor, save);
-
The first parameter must be a string. It will represent the name of the widget in the list of widgets in the admin panel if you click on the
Create Widgetbutton. -
The second parameter must be also a string. It will represent the icon of the custom widget in the admin panel. The icon set is from www.fontawesome.io . You only need to add the name of the icon. For example, if you want to have the comment icon, you have to write only “comment” instead of “fa-comment”.
-
The third parameter should be your callback function, which will be called if the widget is loaded. This function will get two parameters. The first parameter is the widget container as a jQuery-object. The second parameter is the widget configuration as an object.
-
The fourth parameter should be your callback function for the edit area. Here you can use a lot of libraries, like Bootstrap, jQuery UI, etc. Also there are some Connections Engagement Center functions, which will help you to reach the same layout as the normal widget editors. A Save - button is automatically rendered into the editor. Your callback function will get also two parameters: The first is the edit area as a jquery-object, the second parameter is the widget configuration-object. Within the widget configuration you can fill your input fields in the edit area, like title or height.
-
The fifth parameter should be your callback function for the Save button. Your callback function will get two parameters. The first is the edit area as a jquery-object, the second parameter is the widget configuration-object. You have to read out the data of your custom edit area and save them into the widget configuration.
-
The sixth parameter is optional. Here you can specify in which Connections Engagement Center Mode the widget will be shown. By default the widget will be available in all Connections Engagement Center Modes.
3. Update the custom.js on the ICEC server
-
Click on Customize > Engagement Center Settings > Customization Files > Upload File

-
Navigate to the location of the
custom.jsthat you saved in an earlier step, select it and click on Open. You should receive a result similar to the screen below confirming the file was uploaded.
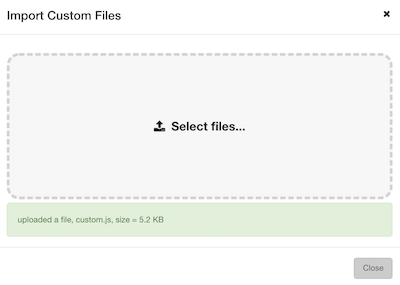
- Click the Close button.
4. Add the helloWorld widget to the Hello World page
- Click on the navigation link for Hello World to be taken to that page. Validate by looking for the page title and the
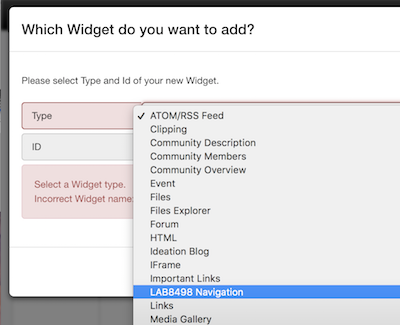
?page=helloWorldin the URL displayed by the browser - Click on Customize > Widgets > Create Widget
Warning If the widget does not show up in the list, bring up your developer console and reload the page after clearing the cache as was done in a previous exercise.
- Select the
LAB8498 Hello Worldwidget from the list and in the ID field enter a unique name LabHelloWorld and click on Create.
The widget is added to the page with Hello World inside of it.
5. Modify the helloWorld widget
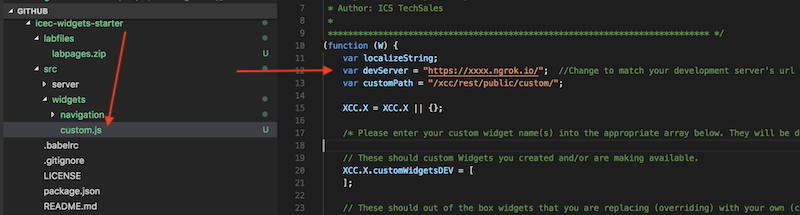
Let’s update the code for the helloWorld widget. Return to Visual Studio Code and in the left navigation expand src > widgets and click on custom.js to open it.
- Add the following script in the helloWorld section to replace the myCustomWidget function
function myCustomWidget(container$, widgetData) {
    XCC.require(["profiles"], function () {
        var profile = XCC.P.getProfile();
        var name = profile.getName();
        var picture = profile.getImageUrl();
        var email = profile.getEmail();
        var phoneNumber = profile.getPhoneNumber();
        var title = profile.getTitle();

        var html = `
                <div class="col-xs-12 col-sm-12 col-md-12 col-md-offset-3">
                    <div class="well well-sm">
                        <div>
                            <div class="col-sm-4">
                                <img src=${picture} alt="" class="img-rounded img-responsive" />
                            </div>
                            <div class="col-sm-8">
                                <h4>Hello ${name}</h4>
                                <small style="display: block; color: #888;"><div title="San Diego, USA">San Diego, USA</div></small>
                                <p >
                                    ${title}
                                    <br />
                                    ${phoneNumber}
                                    <br />
                                    ${email}
                                </p>
                                <div class="btn-group">
                                    <a href="#" class="btn btn-primary"><span class="fa fa-2x fa-facebook"></span></a>
                                    <a href="#" class="btn btn-primary"><span class="fa fa-2x fa-google"></span></a>
                                    <a href="#" class="btn btn-primary"><span class="fa fa-2x fa-twitter"></span></a>
                                    <a href="#" class="btn btn-primary"><span class="fa fa-2x fa-linkedin"></span></a>
                                </div>
                                </div>
                            </div>
                        </div>
                    </div>
            `
        container$.html(html);
    });
}
- Save the file and update as was done in previous steps.
- Refresh the page to see the results
This is not a very useful widget, except that it demonstrates a few things:
-
XCC.P is a set of function that allows you to get access to more information on the current user that is already known by ICEC without having to write additional code to pull the data. You can explore for yourself from the Developer Console what functions are available.
-
Bootstrap classes are included in the HTML for styling.
-
Writing all the logic for our widgets inside of the custom.js is probably not a good idea. Let’s look at other methods.