Add Pages and Navigation
Warning
This step will import a number of files to your ICEC environment including a default custom.js which will replace your existing custom.js. If you need to keep your existing customizations (if any), you need to make a backup of your custom.js before importing the files below.
Safe for Lab
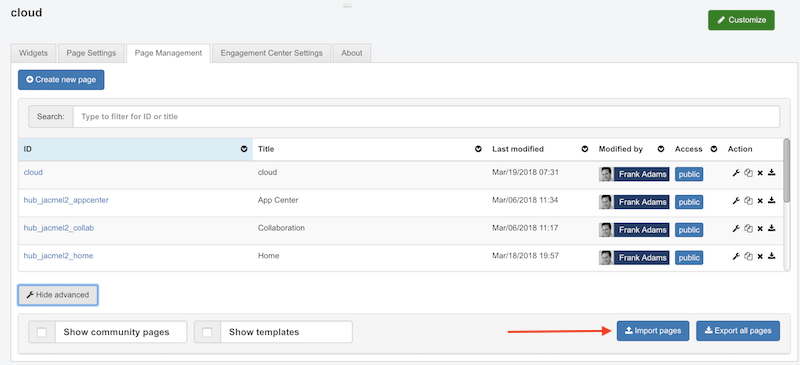
1. Open Page Management
Click on Customize > Page Management

2. Select Import pages
Click on Show Advanced > Import pages
3. Import labpages.zip
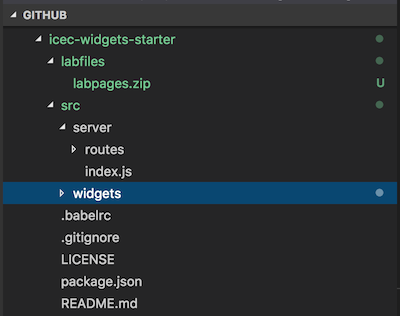
The Github repository that you cloned earlier contains a zip file called labpages.zip. (Do not unzip the file unless you need to modify it.)
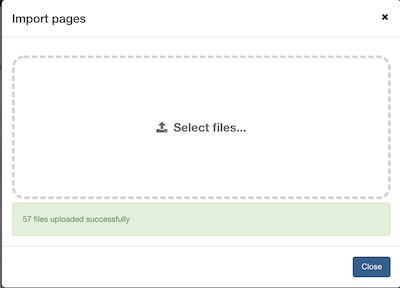
Click Select files and navigate to the location of that zip file, then click Open. You will receive a result similar to the screen below. Click OK.
4. Refresh your browser cache
The custom.js that we just loaded is not in your browser cache. Open the Chrome developer tools More Tools > Developer Tools
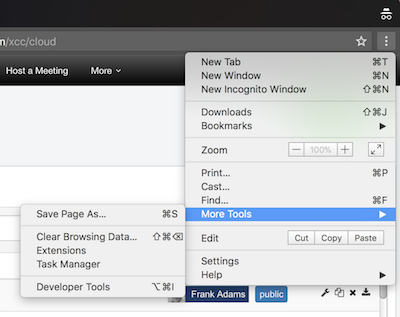
Click and hold on the Refresh page icon in the browser until a drop down menu is presented and click on Empty Cache and Hard Reload
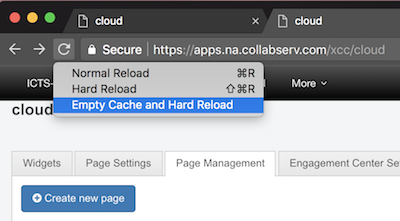
The page will reload with the new custom.js loaded. You may now close the Developer Tools; however, as you make updates to the custom.js throughout the lab, you will need to repeat the above steps to ensure you are viewing your latest changes.
5. Add the Lab Navigation widget to the page
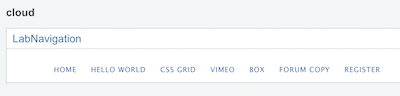
By default when you started from the /xcc/cloud uri, you were placed on the cloud page. We ‘created’ five (5) pages during the import process above to host each of the five (5) widgets we will be developing during this lab. We will now add a pre-built navigation widget to this cloud page you are on to facilitate quick switching to these other pages.
Click on Customize > Widgets > Create Widget
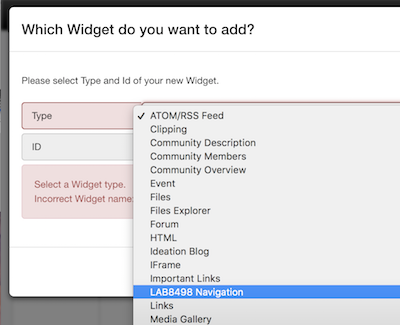
Select the LAB8498 Navigation widget from the list and in the ID field enter a unique name LabNavigation and click on Create.
A widget similar to the one below should now be added to the page.
6. Configure all pages to the same navigation
We now need to add the same navigation widget to all the pages we created. There are two methods available to us:
- Add the same widget to each page individually or
- Make the page we already added the widget on - the
cloudpage - a template and have all the other pages inherit from that template.
We will do the second option in this lab. The pages we imported were pre-configured to inherit from the cloud page that we are currently on; however, the cloud page is not currently known to be a template. Let’s change that now:
ICEC pages are based on grid layouts. To change the grid, you go to “Grid” in “Page Settings” and select the grid you want to use.
-
Click on > Page Settings > Grid and select Grid 13.
-
Click on > Page Settings > Show Advanced and select the Is Template check box and click on Save. (The page should refresh.)
-
Click on Customize > Page Settings > Show Advanced and click on Synchronize Pages
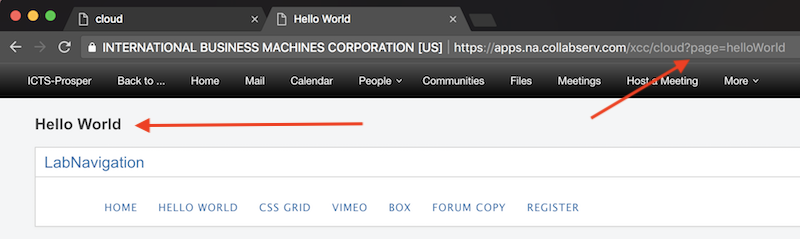
Now if you click on each of the navigation links, you are taken to the appropriate ICEC pages (notice the URL and page title changes).
NOTE: If the pages do not have the Lab Navigation widget on them, then there is a bug in our lab. For each page, you can choose to Customize > Page Settings > Show Advanced and choose cloud in the Inherit From drop-down.